Plum lollies

AA1A5995

First off, happy New Year everybody, and secondly I’d like to update my whereabouts at the moment. I’ve taken a week holiday within my holiday session to camp in the beautiful outdoors with my second family. Technically they are my cousin’s cousins and auntie and uncle, but they are more like my second family (as I’ve said before). I only really see them about once or twice a year, but still I’d like to reinforce my point for the third time now that they are my second family. I’m camping with them in the most luxurious tent. The floors are covered with hand-woven grass carpets, but wait it gets better, I get to sleep in a two person bed for the first to time in my life. To be quite honest I actually prefer my single person bed at home and miss it dearly.

Thanks to the camping situation, I haven’t been on my cell phone for a few days now and it actually feels quite good. I’ve had the time to read a book (which has been so educational (I’m reading an old cookbook written in the 1940’s about local Cape Dutch food)), to swim a lot, to cook a lot and most of all to interact with my second family.

AA1A6010

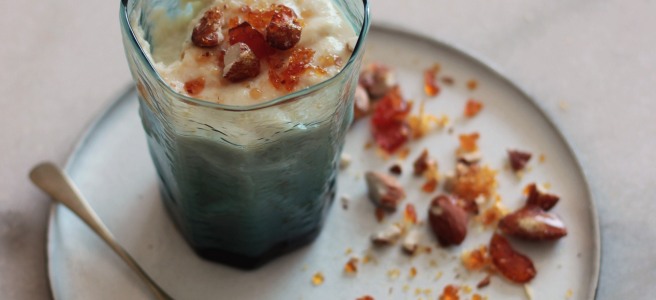
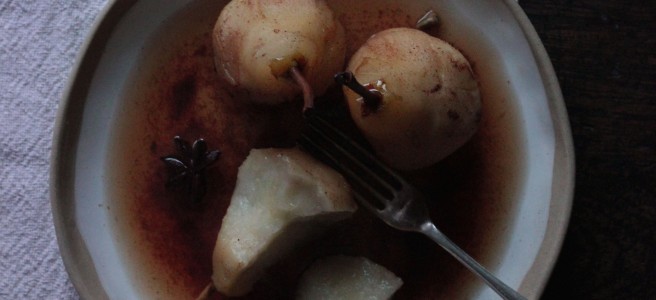
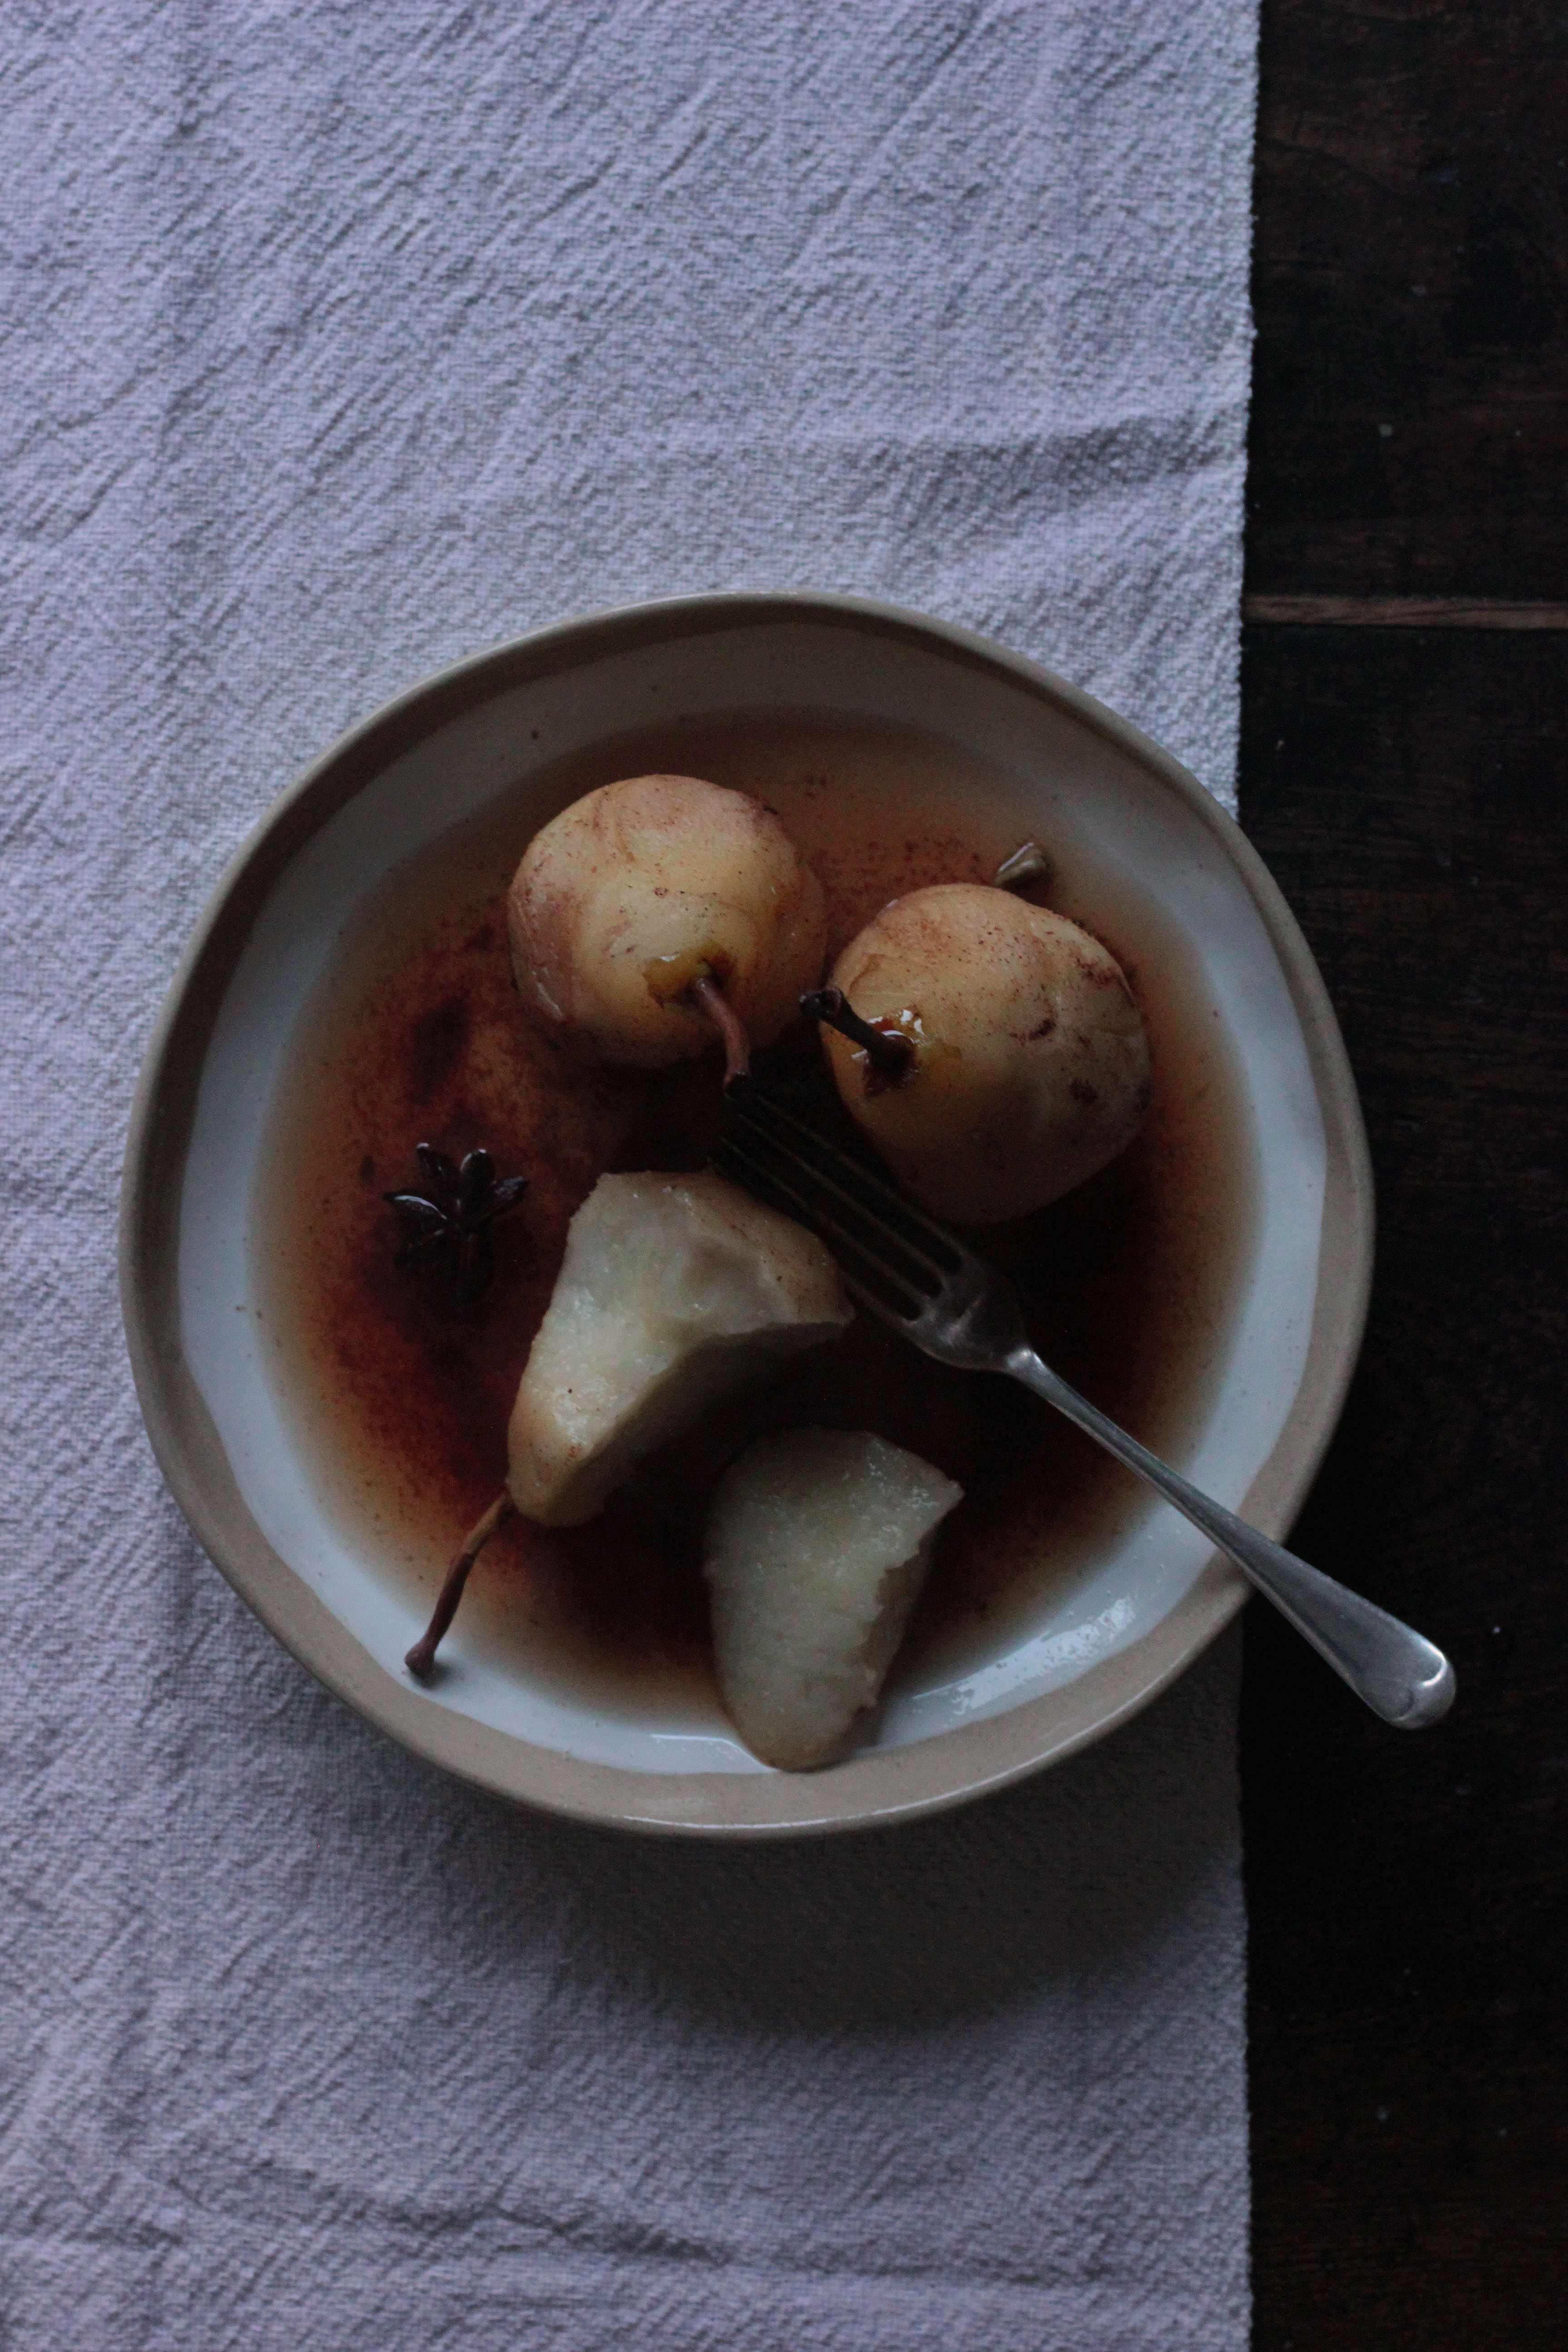
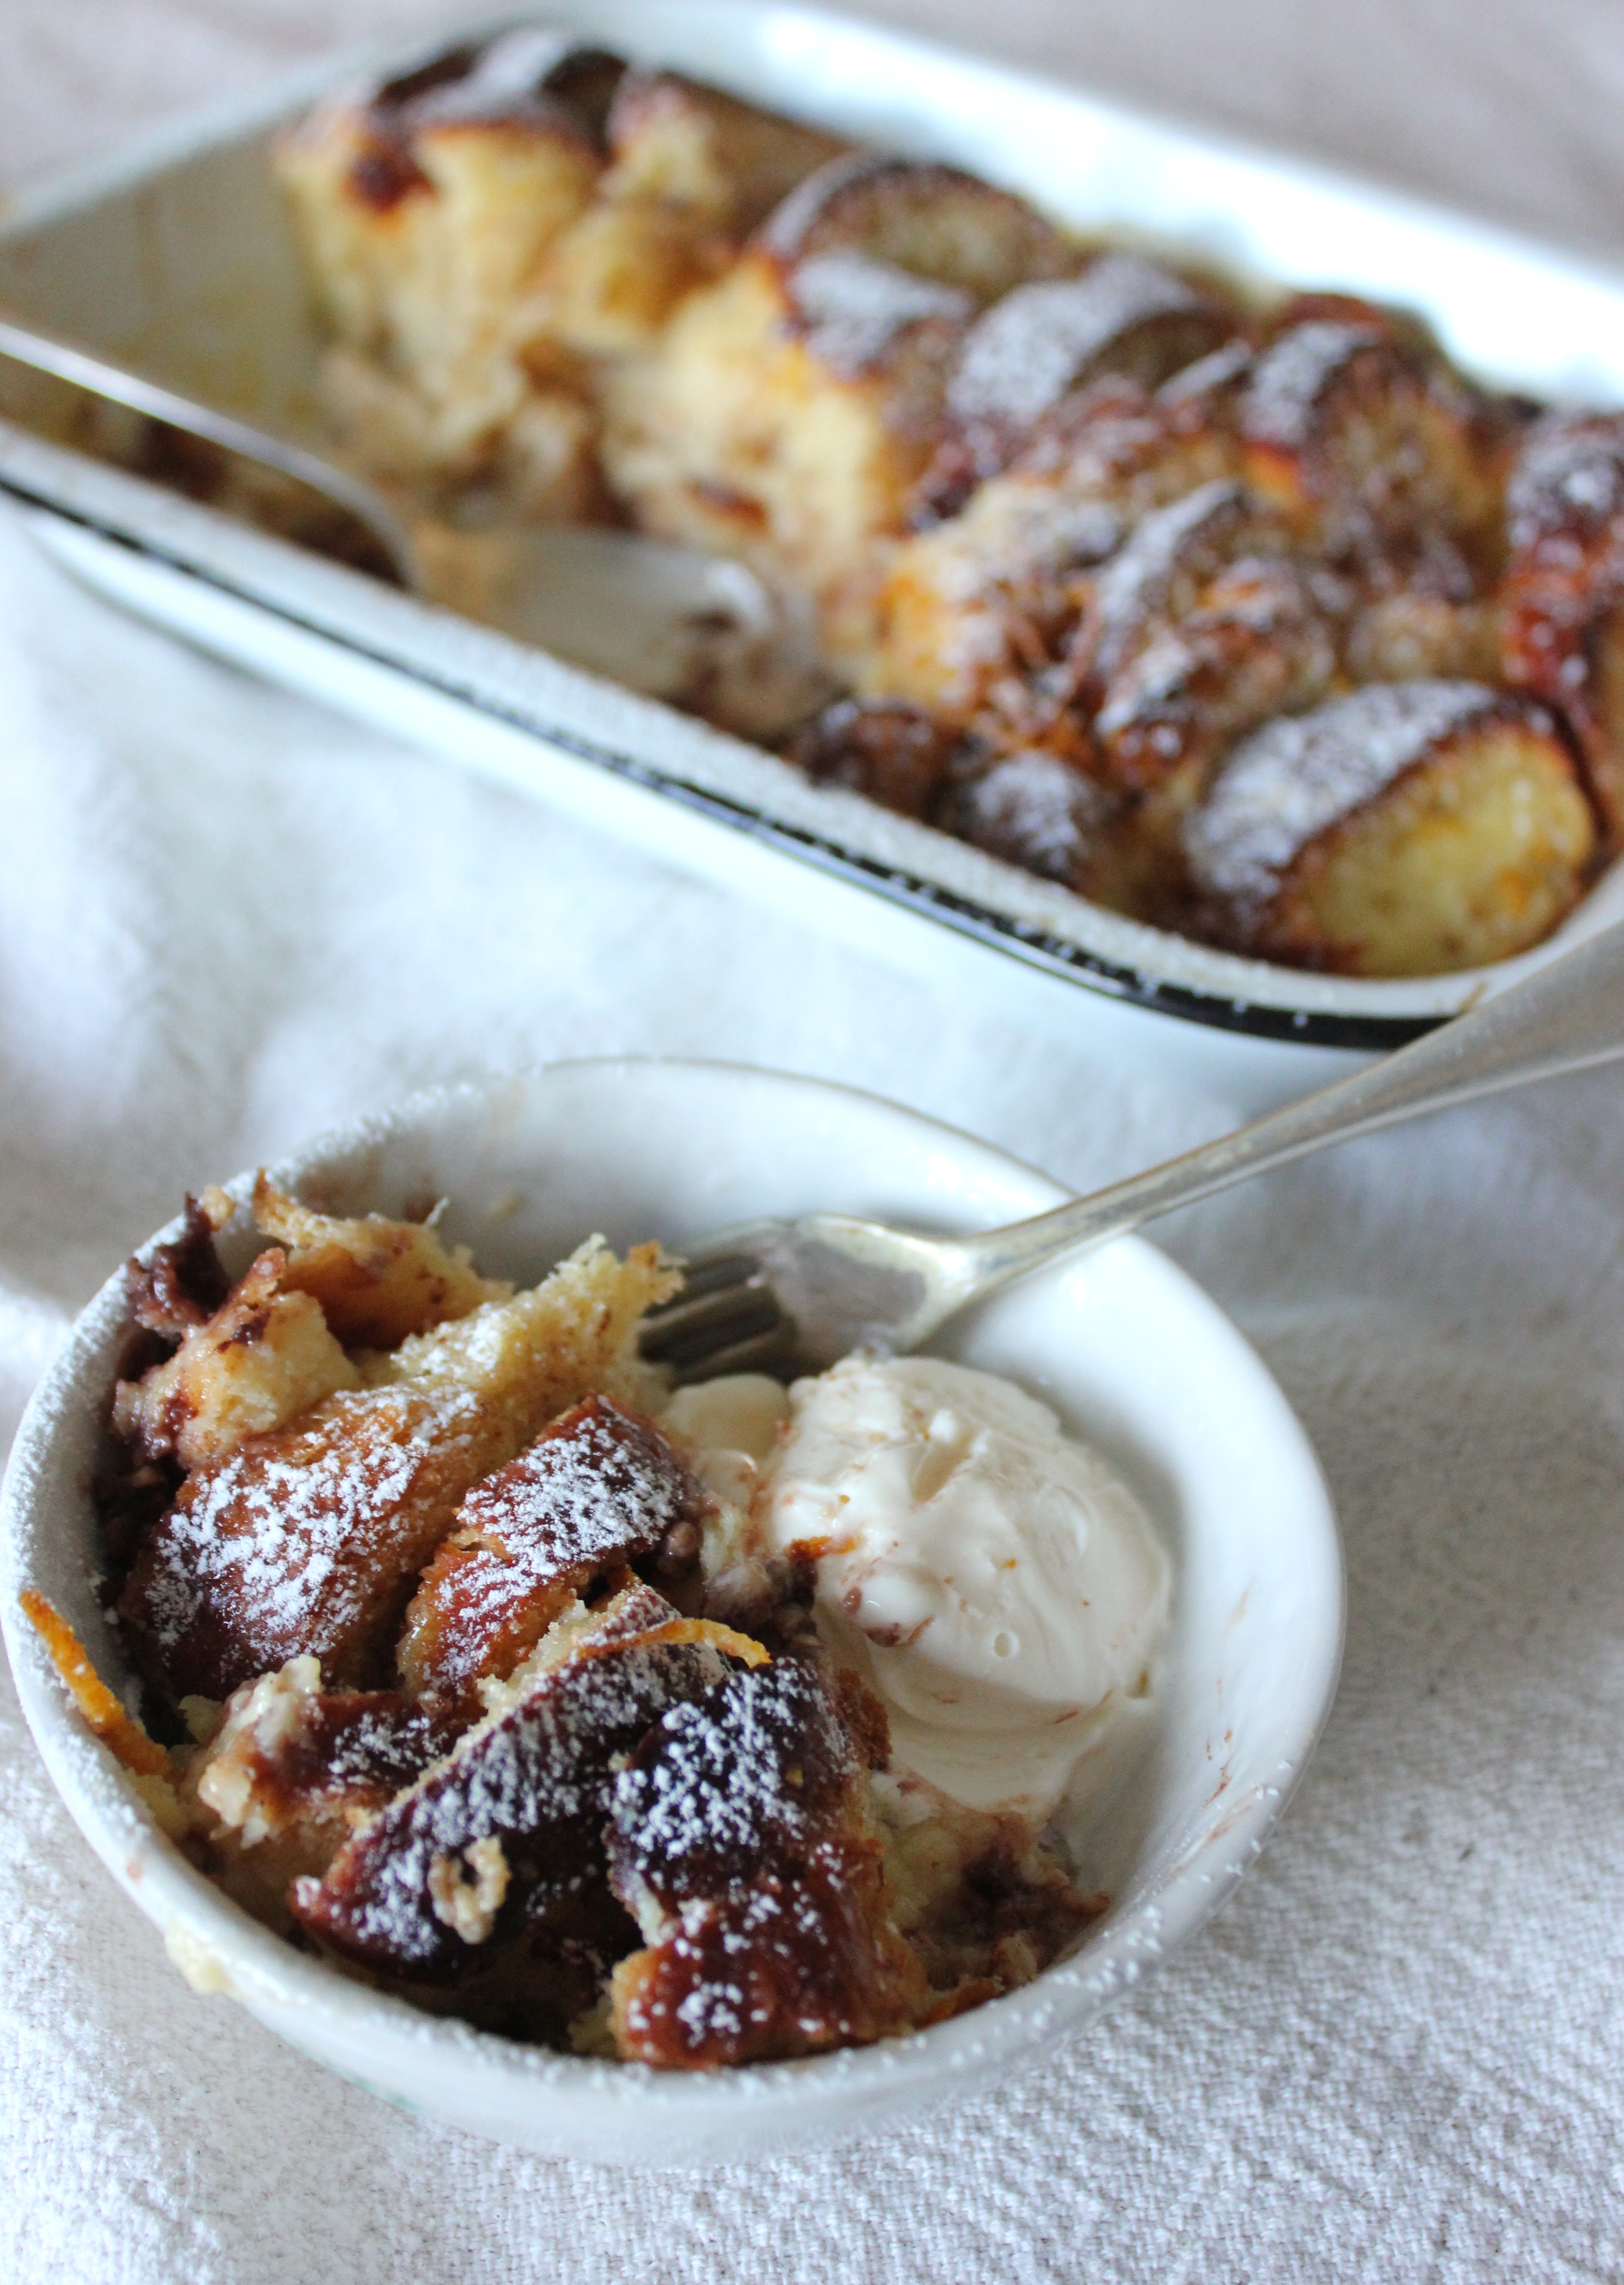
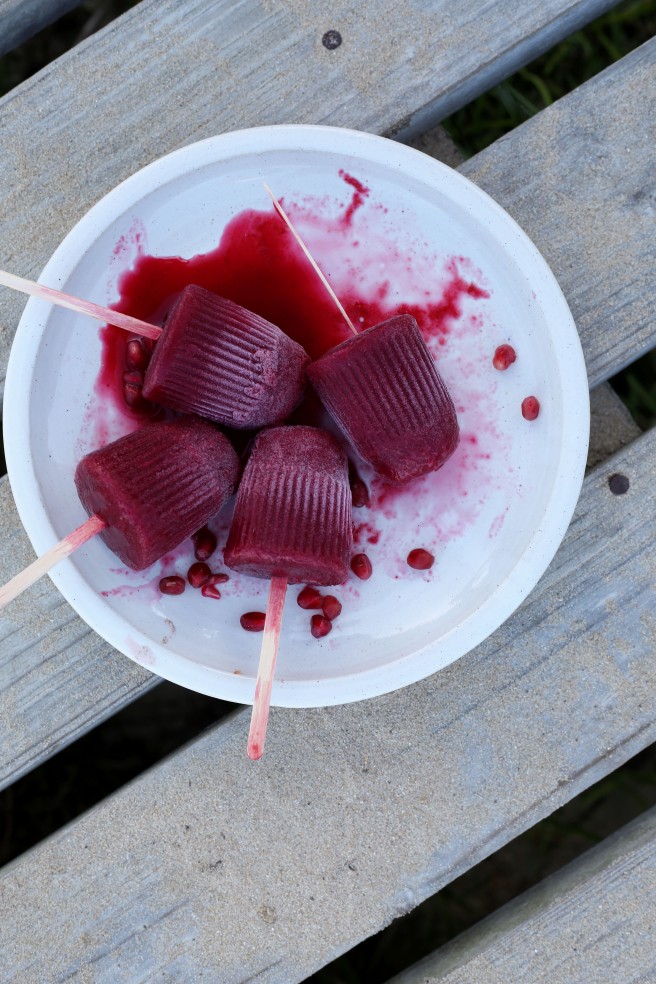
One would think that this would be enough to make one very happy, but not this one at least not completely. I am missing my blog very much. I decided to open my camera bag and create a new recipe. It was natural for me to make lollies simply because the temperatures have been so high here. So my second family and I took our bicycles and cycled to the shops to buy some ingredients. It was so real to experience the process from putting an effort into purchasing the ingredients to finally eating, rather sucking, and some sweet plum lollies. This has got to be one of my simplest recipes for the simple reason that I was able to make these lollies whilst camping (so you have no excuse not to make them). They are super delicious and are the summer version of poached fruit. It is the same process to make them but in the end the fruit is blitzed up and frozen. They are super delicious sweet and slightly spicy with the addition of cloves.

AA1A5956

Plum lollies

Makes 6 popsicles/ lollies

Ingredients:

  • 10 ripe plums
  • 1 cup castor sugar
  • 2 cups water
  • 4 cloves

Extras:

  • 6 yogurt cups
  • 6 ice cream sticks

AA1A5823

Method:

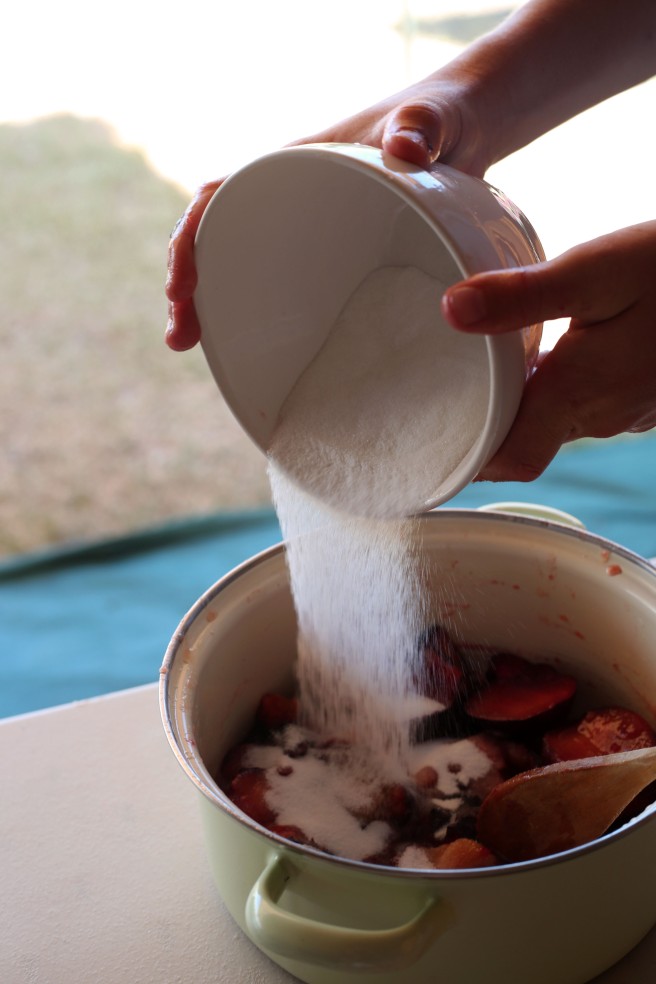
Remove the pips from the plums and place into a large saucepan along with the remainder of the ingredients over a medium heat. Bring the mixture to the boil and then turn down the heat to a light simmer. Leave to simmer for 5 minutes. Remove from the heat and leave to cool.

AA1A5850AA1A5877

Once the mixture has cooled, strain it through a sift or colander. Pour equal amounts of the mixture into your yogurt cups and place in the freezer for 30 minutes.

AA1A5903AA1A5909AA1A5920

After 30 minutes place the ice cream sticks into the lollies. Leave to freeze over night or for 12 hours.

AA1A5929

To remove the lollies from their casing, dip them in hot water and pull out of the casing.

icecream

Vanilla Panna Cotta

IMG_1959

For those of us who don’t have one of those fancy ice cream maker machines, making jelly is the next best summer dessert ever, if not even better.

This recipe is clearly special for no particular reason other than the fact that I’ve used a real vanilla pod. I’ve had this vanilla pod lying around in my little bedroom pantry since the beginning of the year (I’m sure its still alright). I’m the kind of person who will hold onto things so that I can use them for the perfect moment, that moment usually never comes and I and up throwing most special ingredients away. I wanted to put this vanilla pod to good use. So with my trusty Vanilla Panna Cotta recipe in hand, I made Vanilla Panna Cotta. I can never get the seeds to spread across the entire Panna Cotta. They always seem to sink to the bottom in a little spotty pile. I actually think that it is quite beautiful in that way. First it tells the eater, what exactly they will be eating as well as makes reference to the process of making the Panna Cotta, which ultimately makes it more real. If you don’t have a vanilla pod, you could easily substitute it with 2 tsp vanilla extract. You could also buy vanilla extract with seeds, which would work just as well.

IMG_1936

This recipe is free of processed sugar. I used agave syrup as a sugar replacement, and it did the job just as well. Agave syrup is a natural sugar harvested from tree sap. Its glycemic index (I have no idea what that means, but anyway thanks google!) is much lower than other processed sweeteners making it much healthier. It is 30% sweeter than honey. You can find it at you local health shop. It can be slightly pricy similarly to all of these kinds of alternative ingredients like almond flour or coconut oil. Without going off topic too much, this is a struggle that I am facing with “healthier” baking. It is just astronomically expensive and so I try to find accessible and affordable ingredients for you guys. I’m sure (and I hope) the prices will decrease in the nearer future, as I know that the world is moving in this direction. Anyway back to the Panna Cotta, the agave syrup works just as well as any processed sweeteners would. The Panna Cotta remains sweet without it being too sickly sweet. Also there are no added flavours from the syrup, which means no distracting flavours away from the vanilla.

Panna Cotta is such a simple thing to make yet delicious and fresh at the same time. It is basically just milk, cream, vanilla and gelatine. It has a gentle creamy flavour and is best served with berries.

Vanilla Panna Cotta

Makes 6 small individual puddings

Ingredients:

  • 1 vanilla pod (or 2 tsp vanilla extract)
  • 75ml full fat milk
  • 425ml cream
  • 100ml agave syrup (or honey)
  • 2 leaves gelatine

Method:

Scrape the seeds from the vanilla pod and place into a large saucepan together with the pod.

IMG_1907

Add your milk, cream and agave syrup to the pan and place over a medium heat. Bring to a light simmer.

During this time you can prepare your gelatine sheets. Place into a shallow plate filled with cold water. It must be cold so that the gelatine does not dissolve. Leave to hydrate for 2-3 minutes.

Once the gelatine is soft, squeeze the sheets to rid the water. Place into a jug. Place a sift/strainer over the jug and pour your milk and cream mixture into the jug. By doing this, your vanilla pod stays out of the liquid jelly. Remove any seeds from the pan.

Mix the mixture together. Pour equal amounts into six small glasses or jelly moulds. Place into the fridge and leave to set for 6 hours or over IMG_1933To remove from the moulds drop each mould into some boiling water and then turn the Panna Cotta out onto your

IMG_1956

Knife and Measuring cup from Zyliss.

Creamy Almond Pudding + Almond Brittle

IMG_0860

“I can’t wait to eat that pudding. That’s like my ultimate.” This is what my mom said to me an hour before she scuffled down her ‘ultimate’. In fact anything with almonds would be her ‘ultimate’. The fact is that she was right in being excited for her ‘ultimate’ because it’s just so darn ultimate!

IMG_0778

This is a delicious creamy almond pudding made using milk, ground almonds and a few other ingredients. It isn’t the kind of pudding that is too sweet to finish, which makes it easier to eat lost of it. The recipe is adapted from a Moroccan pudding called ‘Mulhalabya’ which is also an almond pudding, but uses cinnamon and rosewater as flavourings. My version only uses almond extract to flavour it. I chose this flavouring because I simply wanted to accentuate the flavour of the ground almonds. You can taste the mellow flavour of the almond and feel the coarse texture of the crushed almonds. Unlike other set puddings that take hours to firm up, this one only takes 40 minutes in the refrigerator to set, meaning before you know it you’ll be eating creamy almond pudding. The almond brittle adds an extra crunchy texture as well as sweetness. This is the perfect afternoon tea treat or post dinner pudding.

Enjoy!

Creamy Almond Pudding + Almond Brittle

Makes 4 individual puddings

Ingredients:

Creamy Almond Pudding:

  • 750ml milk
  • 3 tbs castor sugar
  • 2 1/2 tbs cornflour
  • 1 tbs ground rice
  • 3 tbs water
  • 100g ground almonds
  • ½ tsp almond extract

Almond Brittle:

  • 30g raw almonds
  • 40g castor sugar

IMG_0788

Method:

IMG_0793

Creamy Almond Pudding:

1.Bring the milk to the boil over a medium heat. Stir occasionally so that it doesn’t burn.

2. In a bowl mix the castor sugar, corn flour, ground rice, and water. Leave to one side for the moment.

IMG_0798

3.Once the milk has come to the boil, pour into the bowl with your castor sugar, corn flour, ground rice and water. Whisk until all ingredients are well combined. Pour the mixture back into your saucepan and place over a medium heat. Whisk constantly until it comes to the boil. Continue until it thickens slightly. This takes about 5 minutes.

4. Once it has thickened, add your ground almonds and turn down the heat. Continue mixing for 2 minutes. Remove from the heat and leave to cool slightly.

IMG_0810

5. Pour the pudding into 4 drinking glasses (you could leave it to set in the bowl and not have individual puddings). Cover with plastic wrap and leave to set in the fridge for 40 minutes.

Almond Brittle:

IMG_0828

1.First place your almonds onto a piece of baking paper. They should be placed closely together.

2. Place your castor sugar into a saucepan over a medium heat and leave to melt. Do not stir the sugar with a utensil because it will crystallise. Shake the pan around so that the sugar doesn’t burn. Once the sugar has melted pour evenly over your almond. To make washing up easier, immediately submerge the pot in hot water.

3. Let the sugar set and become hard.

Assembly:

1.Crush the brittle using something heavy. Remove the set puddings from the fridge and pour the crushed brittle over the top of each one.

IMG_0868

Happy Stirring!

-Ben

Glasses & Vase from Carrol Boyes

Measuring cup from Zyliss

Poached pears in honey (no added sugar)

IMG_8004

It’s been quite a miserable day in Cape Town today; grey skies, rain and homework. When I got home after a long day of school I knew that I had to face the awful task of re-writing essays and finishing up homework. I still haven’t got to them in fact. School has been quite dull lately and I’m quite ready to finish off my schooling career. I’m trying not to think about the fact that I still have one and a half years left (which isn’t actually that bad). I’m sure you’re thinking “Oh Ben, you must enjoy school while it lasts man!” but I’ve actually got things I’d like to do with my life. To be honest I’m not even sure what day it is? Is it Wednesday or Tuesday? Anyway, that doesn’t even matter cause it’s the perfect day for something warm. Back to the reason I’m writing this (besides for procrastinating). I made these deliciously sweet and spicy pears because I wanted to add some excitement into my day. They are the perfect poached pears anyone could ever ask for. The recipe contains no added sugar, making it healthy. I used honey to sweeten the poaching liquid and it worked so well. While the pears poach they soak up the spicy scent and sweet flavours. The flavour of the honey isn’t too overpowering or bitter like in other recipes. It seems to almost evaporate into thin air and just leaves the perfect amount of sweet tastiness. You could really use any spices you like or have in your cupboard. I used cinnamon, star anise, cardamom, and vanilla (the usual suspects). I actually feel incredibly full after just eating one pear. I hope you enjoy this recipe as much as I enjoyed eating and smelling it in my kitchen.

IMG_8037

Poached pears in honey (no added sugar)

Makes enough liquid for 3-4 pears

Ingredients:

  • 3 or 4 pears
  • ¼ cup honey
  • 1 ¾ cups warm water
  • 1 tsp vanilla extract
  • 4 cardamom pods, crushed slightly
  • 1 star anise pod
  • 1 tsp ground cinnamon (you could use ungrounded cinnamon)

IMG_7956

Method:

1. Peel you pears (I used my Zyliss knife).

IMG_7968

Place them into a small saucepan.

2. In a measuring cup (I used my Zyliss measuring cup) measure out the honey and water.

IMG_7972

Mix the honey and water together and pour over the pears. Add the remainder of your ingredients.

IMG_7980

IMG_7985

3. Place the pears over a medium heat and bring to the boil. Once the liquid has come to the boil, turn down the temperature so that they bubble at a light simmer. Leave to simmer for 30-40 minutes until soft. You will need to turn the pears regularly in the liquid. Remove from the heat and serve immediately.

Serve warm plain or with ice cream

IMG_8013

Malva Pudding

IMG_7713

If you’re the kind of person who burns your food, then this is the recipe for you. If you’re not that person then today you could taste the wild side…

Malva pudding is a traditional South African dessert, which originates from my home city, Cape Town. It is a sticky sponge pudding that contains apricot jam. It’s sort of like a sticky toffee pudding, but better, less sickly sweet with a slight tang from the apricot jam. Once the sponge is baked, a buttery sauce is poured all over making it sticky and soft. The trick is to burn the top, by doing this the sponge becomes dry and absorbs the sauce better, almost like when you make bread and butter pudding. It’s better to use stale bread so that the egg custard is soaked up.

Malva pudding was always my favourite dessert as a child, served with hot custard (check out my homemade custard recipe here). We would only eat it on special occasions, always shop bought, but as soon as I tried the real thing, I knew I would never buy it again.

This is my Auntie’s recipe and it’s probably one of the easiest recipes around. The sponge is so simple; all you have to do is put all of the ingredients in a bowl, mix them together and bake. It can be prepared up to two days in advance and reheated when the time comes to serve it up.

Malva Pudding

Serves 10-15 peopleIMG_7663

Ingredients:

Sponge:

  • 2 cups flour
  • 2 tbs bicarbonate of soda
  • 2 cups castor sugar
  • 2 eggs
  • 2 tbs apricot jam
  • 2 tbs vinegar
  • 2 tbs melted butter
  • 2 cups milk

Sauce:

  • ½ cup cream
  • ½ cup milk
  • 1 cup dark brown sugar
  • ½ cup water
  • ½ cup butter

Method:

  1. Preheat the oven to 180 degrees Celsius and grease a 15 x 20 baking tin.
  2. In a bowl, combine the sponge ingredients to the flour, one at a time and mix until well combined. Pour the sponge batter into your prepared baking tin and leave to bake for 45 minutes until dark brown and the top has been just burnt.
  3. Prepare the sauce. Combine the ingredients in a saucepan over a medium heat and leave to melt until it comes to a slight simmer. Stir occasionally so that nothing burns. Also, watch it with hawk eyes, because I for some reason got distracted and the sauce bubbled out of the pan and all over my stove top.
  4. Once the sponge is baked, remove from the oven and poke with a knife or toothpick. Pour  the sauce over the sponge immediately. It might seem like too much, but trust me it will all work out. Leave for a few minutes for the sauce to soak into the sponge.

Serve warm with custard or ice cream

This article was originally posted on Zanita.com by me!

Baklava

IMG_6526

Let me tell something. I now love Baklava thanks to it being made at home! Before I made Baklava myself I never really appreciated the effort that goes into making it and to be honest had no idea what real Baklava tasted like. I’ve only tasted Baklava that is so sweet it makes your mouth shiver. After my mom made the silly mistake of buying filo pastry instead of puff pastry I was faced with the challenge of putting the filo to good use. Turns out it wasn’t that much of a silly mistake after all.

You could say it’s cheating to buy ready-made filo pastry, but I’m simply using the service that the grocery stores offer. Besides who has the time to roll out paper-thin pieces of pastry?

What I love about baklava is how it is so crisp and sticky at the same time. It has an almost spongy nut filling that is brightened up with spices and orange zest. The pudding is drenched in homemade orange syrup which makes it sticky and chewy.

Baklava

Serves 8-10

Ingredients:

Baklava

  • the zest of 2 oranges
  • 300g ground almonds
  • 100g pistachio nuts, crushed
  • 100g castor sugar
  • the seeds from one cardamom pod
  • 1 tsp ground cinnamon
  • ½ tsp rose-water/ vanilla extract
  • 150g butter, melted
  • 250g filo pastry

Orange Syrup:

  • 200ml water
  • the juice of 1 orange
  • 250g castor sugar

IMG_6392

Method:

1. Preheat the oven to 180 degrees Celsius.

2. To make the filling combine the orange zest ground almonds, pistachio nuts, castor sugar, cardamom, cinnamon, and the rose-water/ vanilla extract in a bowl.

IMG_6373

I used my Zyliss citrus zester to zest the orange

IMG_6394

3. Using a kitchen brush, brush a 12 by 9 inch baking tin. Place your first layer of filo into the tin so that it covers all sides of the tin. Brush with butter and then place your second layer.

IMG_6405

Continue until you have 4 layers, each with a brushing of melted butter in between.

4. Pour your filling into the tin and press down.

IMG_6407

Pour a little butter onto the filling. Place a sheet of filo onto the filling. Brush with butter. Place the next layer and brush with butter. Continue until you have used up all of your filo sheets. Brush the top layer of with butter. Slice away any pastry that hangs over the edges of the tin. Using a very sharp knife (I used my Zyliss knife), cut diagonals lines across the baklava. Cut in the opposite direction to make diamonds.

IMG_6423

IMG_6424

5. Place in the oven and leave to bake for 30-35 minutes until golden brown.

6. During this time you can prepare the orange syrup. Place the syrup ingredients into a saucepan over a medium heat. Leave to simmer for 15-20 minutes until it has reduced and become syrupy. Stir occasionally.

7. Once the baklava is completely baked remove from the oven. Immediately pour the syrup over the baklava.

IMG_6433

Leave to soak for a few minutes before serving.

Custard

IMG_5010

Custard is my ultimate everything. The simplicity of its creamy texture and sweet vanilla flavour is, simply put, beautiful. There is nothing better than eating freshly made warm custard.

Custard 
Serves 4-6 people
Ingredients:
  • 420ml cream
  • 420ml milk
  • 2 tsp vanilla extract or 1 vanilla bean
  • 75g castor sugar
  • 8 egg yolks (Save the whites for meringues- try my Chocolate Pavlova recipe)
  • 1 tbs cornflour

IMG_4908

Measuring milk with my Zyliss cup measurer
Method:
1. In a saucepan over a medium heat, combine the cream, milk and vanilla.
IMG_4940
If you’re using a vanilla bean, slice  the bean in half (I used my funky orange Zyliss knife for this part) and scrape the seeds out with the back of your knife or a spoon. Stir the mixture till just before simmering point, by that time little bubbles would have formed on the surface of the mixture.
2. In a separate bowl beat the egg yolks and castle sugar till light and fluffy. Next add the cornstarch and mix.
3. Once the cream and milk are ready strain through a sift. This will get rid of the skin on the surface of the milk and cream. Strain it a bit at a time into the yolk mixture, mixing continuously so that the eggs don’t scramble.
4. Place back on the stove over a low heat. Stir continuously till the custard thickens. It should take about 4 minutes. You may need to remove the custard from the heat a few times to control the temperature.
5. Pour the custard into a serving jug. Serve warm straight away or cover the surface with cling wrap, so that a skin doesn’t form, and place in the fridge.

Mom’s Bread & Butter Pudding

IMG_3780

Bread and butter pudding to me is more than just a pudding. It was something my mother would always bake. Either it was the only thing she knew how to bake or (and this is the reason that makes most sense to me) she loved it so much that she never get tired of eating it. One of the best parts of the pudding is its texture. It has a crisp crunchy crust; beneath the crust rests a soft spongy pudding. This warm and comforting pudding is one of my personal favourites. This pudding is my childhood and I thank my mother for making it that.

Mom’s Bread & Butter Pudding

Serves 6-8

Ingredients:

  • 50g raisins or chocolate
  • 50g room temperature butter
  • 10 slices of white bread (I used leftover home-baked Challah)
  • ground cinnamon
  • 3 eggs
  • ½ cup castor sugar
  • 250ml cream
  • 100ml milk
  • zest of half an orange

Method:

1. Preheat the oven to 180 degrees and grease a baking dish with a little butter.

2. If you are using raisins soak them for 5 minutes in a little boiled water. Once they have become plump, drain off any water in the bowl. If you are using chocolate chop it to small pieces.

3. Slice your bread into triangular shapes. Butter each slice. Place the bread slices into the baking dish, sprinkling cinnamon between each piece. Sprinkle your chocolate or raisins over the bread now.

4. Mix your custard. Mix the eggs, castor sugar, cream, milk and orange zest. Pour the custard over the bread and leave to soak for a few minutes until the bread has absorbed most of the custard.

Place in the oven and bake for 15-20 minutes till the custard has set and the bread has become crispy. Remove from the oven and serve warm.

Serve warm with cream or ice-cream and a dusting of icing sugar.

Edible Ice-cream Bowls

IMG_3287

These little pastry bowls have been designed to fit your favourite ice-cream and toppings into. Once you’ve scooped all the ice-cream out these bowls, brake them apart and eat them up.

Edible Ice-cream Bowls

Makes 6 bowls

Ingredients:

  • 90g cake flour
  • tiny pinch of salt
  • 2 tbs tbs castor sugar
  • 60g butter, chilled and cubed
  • 20ml cold water
  • Plus 6 scoops of your ice-cream of choice (I used The Creamery’s Toasted Coconut ice-cream)

Method:

1. In a bowl, mix your flour, butter, castor sugar and salt till a bread crumb like mixture forms. Add your water in a bit at a time. Mix till a soft pastry dough forms. Wrap in plastic wrap and leave to rest in the fridge for half an hour.

2. Pre-heat the oven to 180 degrees celsius and grease a cupcake tray holder (I will refer to the cupcake tray holder as ‘cupcake holder’ from now on). You will need six cupcake holders.

3. Using a rollong pin, roll your chilled pastry out. Roll till about half a centimetre thin. Cut out 6 circles using a cutter or a drinking glass. Place a pastry circle in each cupcake holder. Press the pastry into the sides of the tray. Crimp the edges of the pastry, and prick the bases using a fork.

4. Using baking paper cut out 6 squares, about the same size as your cupcake holders. Scrumfle them up and then open them out so that the paper becomes easy to shape. Place 1 square in each cupcake holder. Pour a few baking beans/ rice in each holder. Place in the oven and bake for 5 minutes. After 5 minutes remove the baking paper and bake for another 2 minutes till the pastry becomes light golden brown. Remove from the oven and leave to cool completely before scooping your ice-cream into each holder.

IMG_3276

IMG_3273 copy

Baked Peaches

IMG_3256

As you break the fruit apart, your fork effortlessly melts the warm baked peach into pieces. Each forkful is pure sweetness and warmth. The peaches are sweetened with honey and flavoured with vanilla and cinnamon. It’s the easiest, fastest, most delicious dinner party dessert ever.

Baked Peaches

Makes 1 peach, it can easily be made into a dessert for any number of people. Simply times the ingredients by how many guests you have/ how many peaches you would like.

Ingredients:

  • 2 tbs honey
  • 1/4 tsp vanilla extract
  • 1/4 tsp cinnamon
  • 1 dessert peach
  • a little icing sugar to dust on top (optional)

Method:

1. Preheat your oven to 180 degrees celsius, on fan and grill. Place a sheet of baking paper in a roasting dish (this makes it super easy with the dinner party dishes).

2. Cut your peaches in half and remove their pips. Mix your honey, vanilla, and cinnamon in a little bowl.

3. Place your peaches on your baking tray. Pour your honey mixture over them. Place in the oven and bake for 5 minutes till they become soft and the honey becomes thick and bubbly. Remove from the oven and serve with a dusting of icing sugar.